

Strawberry plants are excellent candidates for growing vertically. They are compact, produce delicious berries and benefit from keeping their fruit off the ground. Creating a DIY vertical strawberry tower has many benefits and can be an easy way to keep strawberries in a small space or even grow strawberries on a deck, patio or balcony.
We’ve been growing strawberries for over 15 years and recently have been experimenting with the best methods for growing strawberries. This year alone we are growing strawberries in raised beds, rows, vertical towers, planters, in flower gardens and in raised stacked beds. In this article we will discuss 2 methods for building a DIY vertical strawberry tower – a wooden strawberry tower and a PVC strawberry tower. Each DIY strawberry planter we made was created using basic materials and skills and were easy to assemble in under 1 hour.
Below you can see exactly how to make each DIY vertical strawberry tower as well as some general information for growing strawberries and tips for how to grow strawberries vertically.
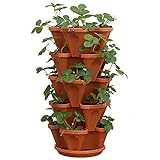
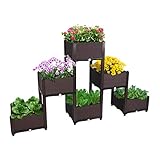
See the Best Strawberry Planters for growing strawberries in containers.
Hello I’m Gretchen! I’ve been homesteading for over 15 years and sharing my stories to help you on your journey. Here at the Backyard Farming Connection I am connecting the dots between gardening, raising animals, and from scratch cooking and baking. Make sure to sign up for my newsletter to get up to date recipes, gardening tips, and support for raising backyard animals.
Contents
DIY Vertical Strawberry Tower: Wood versus PVC
When considering the choice between using PVC or wood for a DIY vertical strawberry tower, there are several factors to consider. PVC offers advantages such as affordability, easy availability, and lightweight construction, making it an ideal option for those on a budget or looking for a quick project. However, PVC may have limitations in terms of durability and longevity, especially in harsh weather conditions or over an extended period of use.
On the other hand, wood provides a more sturdy and durable structure, particularly if treated or rot-resistant varieties are used. Wood offers a natural aesthetic appeal and can be customized to fit various designs. While wood may be slightly more expensive and require additional maintenance, it often provides a longer lifespan and can withstand outdoor elements better than PVC.
Ultimately, the decision between PVC and wood for a vertical strawberry tower comes down to personal preference, budget considerations, and the desired lifespan of the structure. We chose to make both. We like the look of the wooden vertical strawberry planter better but appreciate the ease and options with the DIY vertical strawberry planter made from PVC.
General Building Information
Once you’ve decided whether to use PVC vertical strawberry planter there are several other things to consider. We will show you exactly how to make these planters below, but you can easily adjust some of the elements to make the strawberry tower work for you and your space.
Height: We made both out vertical strawberry towers inside large planters. To keep the towers from tipping over, we kept the height below two feet. If you want taller planters, you can simply increase the size of base, put your tower right in the ground with a stake for support or attach the top of the tower to something to keep the tower from tipping over. If you do make the tower taller I also recommend using a watering system to insure that all the plants get water.
Base: We put both out DIY vertical strawberry towers in pots. You can also build a wooden box to form the base of the tower or put the tower into a garden as mentioned above.
Number of Planting Holes: The taller the tower, the more holes you can plant. We tried to keep our holes at least 12 inches apart. You can experiment and get creative with this. Planting holes should be under 2 inches in size to keep the soil from falling out the hole.
Building the Vertical Strawberry Planter PVC Pipe
A DIY vertical strawberry planter made from PVC is very easy to build and offers a quick and easy way to grow strawberries. If you can find repurposed PVC that will save money, otherwise you can purchase PVC at most home goods stores. The widest PVC I could find for a reasonable price was 10 inch diameter pipe. Ideally you should find PVC with a wider diameter to give the roots enough space to grow.
Step 1: Gather Supplies for a DIY PVC Strawberry Planter
- PVC: ideally a diameter of at least 10 inches (preferably more). You can make the tower as tall as you like but note that if you go much above 24 inches, you will need reinforce the tower as it may tip over especially once the plants add weight to the top. We used a 24 inch long PVC pipe
- Planter (optional – you can also put the PVC directly into the ground.
- Drill with 1.25-2 inch drill bit. We used a 1.5 inch drill bit and this sized hole is keeping in the first and giving the crown enough space
- Potting soil/compost mix
- Strawberry plants

Step 2: Drill Holes in the PVC
Drill your holes in the PVC. Ideally you want to stagger the holes and keep them about 10-12 inches apart. Remember that one end of the PVC will be put into the dirt. We left about 6 inches to go into the dirt and were able to space out 4 holes in the PVC.
As mentioned on the supplies list, a 1.5 inch drill bit works well. Note that the plastic will go everywhere so it’s best to drill the holes on a a tarp or somewhere that is easy to clean up.

Step 3: Place Your PVC in the Planter and Fill with Soil
Place your PVC piece upright inside the planter and fill with soil. You want to make sure that your soil has some potting mix or other material to keep it from becoming too compact in the planter. Strawberries like soil with organic material, so you can mix potting soil with compost at about a 1 to 1 ration.
As you fill the strawberry tower, take time to push down the soil. After your soil is in place, water thoroughly and fill with soil as needed as the soil will settle.

Step 4 Plant Your Strawberries
Plant your strawberries in the planter carefully trying to spread the roots inside the hole and keeping the crown right at soil level. This is hard to do in the small holes – I found it easier to push a hole into the soil and then push the strawberry in and add some additional soil.
Once your strawberries are planted, add additional soil and water throughly.
Put your PVC strawberry tower in a sunny location and continue to water. Strawberries should stay healthy and produce berries in the first year or two.
Building the Wood Strawberry Tower
Another option is to build a wooden strawberry tower. This tower is almost as easy to build at the PVC strawberry tower described above. We chose to make our strawberry wooden tower with a 2 foot tower places into a planter. If the tower is any taller you may need additional supports to keep the tower from falling over. Other options are to place the DIY strawberry planter directly into the garden or to build a wooden base for the tower.
Both the PVC and wooden strawberry planters DIY methods are designed to be easy and built in under 1 hour.
Step 1 Gather your Supplies
- Wood – choose wood that will tolerate the weather such as cedar. We chose 10 inch boards cut into 2 foot sections.
- Wood Glue (for exterior use)
- Outdoor wooden screws – 1 1/2 inch screws or something similar works well
- Drill with screw head and 1.5 inch drill bit
- Large Planter
- Potting soil
- Strawberry Plants

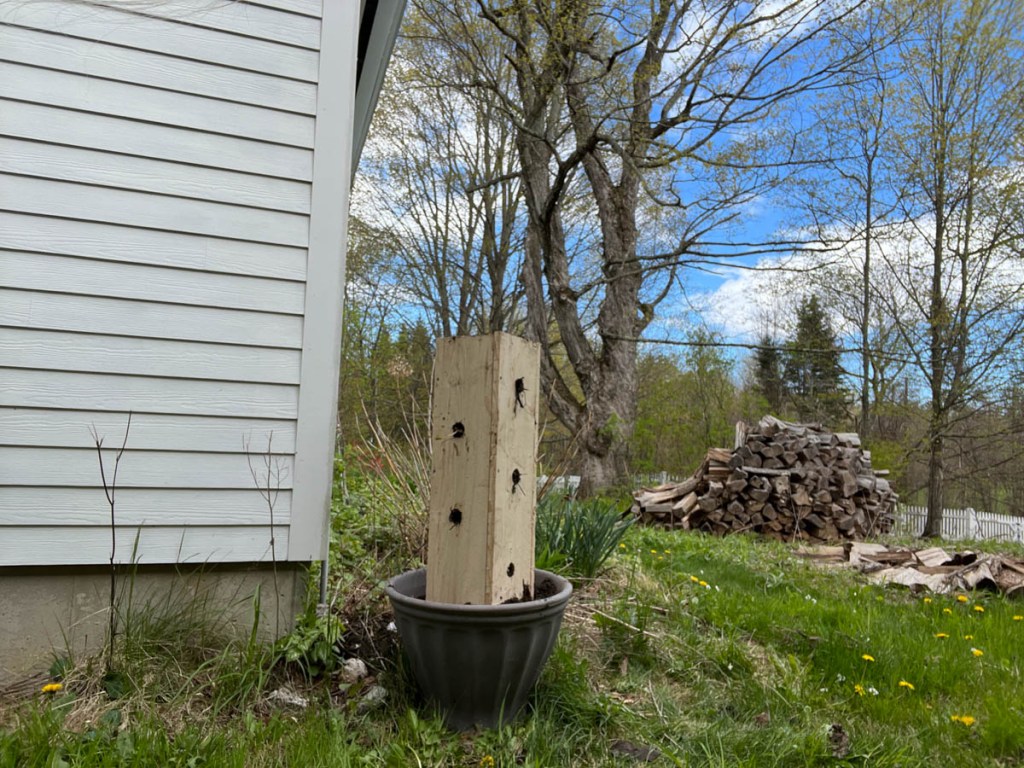
Step 2: Drill Holes and Cut Wood
Cut your board to desired length (we cut them to 24 inches)
Drill holes in your boards. We used a 1.5 inch drill bit. You could get away with any drill bit between 1.25-2 inches. Anything bigger and the soil will spill out and any smaller you won’t be able to plant the strawberries. We staggered the holes with 3 inches in 2 boards and 2 holes in the other board. This is the most you will be able to plant. Remember that one end of the board will be down in the planter so don’t put any holes in this part of the tower.

Step 3: Assemble your Tower
Assemble the tower by screwing the boards together. Run a line of wood glue along the ends of the boards. This only took a few minutes. Remember to stagger the boards to make a perfect square.

Put your DIY strawberry tower into the planter and fill it with soil. Make sure the the soil is pushed down and water thoroughly to help settle the soil. Plant your strawberries through the holes in the tower. We also planted one strawberry in the planter base itself and one on the very top. Try to spread the plants roots and put the crown right at the level of the soil.
Water your strawberry tower thoroughly. You can also put in a PVC pipe watering tube or other irrigation system in the strawberry planter. We’ve found out that the wood strawberry tower dries our much more quickly than raised beds or the PVC strawberry planter.
How to Plant your DIY Vertical Strawberry Tower
Tips for Caring for Strawberries in a DIY Vertical Strawberry Tower
When it comes to growing strawberries in a DIY vertical strawberry tower, proper care is essential for healthy and abundant fruit production. Here are some valuable tips to help you maintain your vertical strawberry tower and ensure optimal growth and harvest:
Selecting suitable strawberry varieties for vertical growth:
- Choose compact or trailing strawberry varieties that are well-suited for vertical gardening, such as “Alpine,” “Temptation,” or “Tristan.”
- Look for everbearing or day-neutral varieties that continuously produce strawberries throughout the growing season, providing a longer harvest period.
See more about the Best Strawberry Varieties.
Tips for planting, watering, fertilizing, and maintaining the tower:
- Prioritize well-draining soil for your tower to prevent waterlogging and root rot. Consider using a high-quality potting mix or a blend of compost, peat moss, and perlite. We combined potting soil with compost to provide a well mixed and rich soil
- Plant strawberries in the pockets or openings of the tower, ensuring proper spacing to avoid overcrowding. Gently spread the roots when planting and cover them with soil, leaving the crowns exposed.
- Regularly monitor the moisture level in your vertical tower and water the strawberries as needed. Avoid overwatering, which can lead to root rot, and maintain consistent moisture to prevent the plants from drying out.
- Depending on the growth of your strawberries, you can apply a balanced organic fertilizer or a slow-release fertilizer formulated for strawberries according to the package instructions. This will provide the necessary nutrients for healthy growth and bountiful fruit production.
- Inspect the tower regularly for pests and diseases. Remove any diseased leaves or affected plants promptly to prevent the spread of infections. Consider using organic pest control methods or introducing beneficial insects to manage pests.
- As the strawberries grow, train the runners to direct their growth within the tower and/or pinch off excessive runners and redirect them to promote better airflow and prevent overcrowding.
- Regularly harvest ripe strawberries to encourage continuous fruit production and prevent overripening or spoilage. Be gentle when plucking the berries to avoid damaging the plants or the tower structure.


By following these tips, you’ll be well on your way to successfully caring for your strawberries in a DIY vertical strawberry tower, maximizing your space and enjoying an abundant harvest of delicious homegrown strawberries.
See 7 Tips for Growing Strawberries.
Troubleshooting and Maintenance
Common issues that may arise with a strawberry tower:
Wilting or yellowing leaves:
Solution: Check soil moisture levels and adjust watering accordingly. Ensure proper drainage and avoid over-watering. Monitor for pests or diseases and take appropriate action.
Slow or stunted growth:
Solution: Evaluate environmental conditions, such as sunlight, temperature, and soil quality. Adjust fertilizer application based on soil testing results. Consider providing additional nutrients or amending the soil as needed.
Lack of fruit production:
Solution: Assess pollination conditions. Encourage pollinators by planting flowers nearby or hand-pollinate flowers using a small brush. Ensure proper spacing and airflow around plants. Adequately fertilize and water the plants.
Pest infestations:
Solution: Identify the specific pest and employ suitable organic pest control methods, such as introducing beneficial insects or using insecticidal soaps. Regularly monitor the plants for signs of pests and take prompt action to prevent damage.
Disease outbreaks, such as powdery mildew or gray mold:
Solution: Provide proper air circulation by spacing plants adequately. Remove infected plant parts and dispose of them properly. Apply organic fungicides or use disease-resistant varieties. Avoid overhead watering.
Nutrient deficiencies or excesses:
Solution: Conduct a soil test to determine nutrient deficiencies. Adjust fertilization accordingly, using organic fertilizers or compost. Follow recommended application rates and avoid over-fertilization.
Overcrowding of plants:
Solution: Thin out crowded plants to improve airflow and reduce the risk of disease. Maintain recommended spacing between plants. Consider transplanting excess plants to another location or container.
Watering problems, such as over or under-watering:
Solution: Monitor soil moisture levels regularly and adjust watering accordingly. Provide consistent moisture without waterlogging the soil. Use drip irrigation or a soaker hose for efficient and targeted watering.
Click on the Image below to download a free copy of the Strawberry Growing Guide.

Harvesting and Enjoying the Fruits of Your Labor
When it’s time to harvest your ripe strawberries from the tower, follow these tips to ensure you enjoy the sweetest and juiciest berries. First, carefully inspect the berries for full ripeness. Ripe strawberries will have a deep red color, be plump, and easily detach from the stem with a gentle tug. It’s important to harvest strawberries when they are fully ripe for the best flavor. Use a pair of garden shears or scissors to snip the stem just above the berry to avoid any damage. Avoid pulling or twisting the berries, as this can harm the plant and its future fruiting. Harvest regularly to encourage continuous production throughout the season, and be sure to enjoy the fruits of your labor right away or store them properly to maintain their freshness.
Homegrown strawberries are a true delight, and there are endless creative ways to savor their deliciousness. Besides enjoying them fresh off the plant, try incorporating your homegrown strawberries into exciting recipes and dishes. You can make mouthwatering strawberry desserts like strawberry shortcake, strawberry pie, or strawberry tarts. Experiment with strawberry jams, jellies, or preserves to enjoy the taste of summer all year round. Blend strawberries into refreshing smoothies or make homemade strawberry ice cream. Get creative with savory recipes too, like strawberry salads with feta cheese, or add sliced strawberries to grilled chicken or salmon for a delightful burst of flavor. With your homegrown strawberries, the possibilities are endless, so let your culinary imagination soar and enjoy the delectable flavors they bring to your kitchen.
Summary of the DIY Vertical Strawberry Tower
In summary, building a DIY strawberry tower is fun, easy and a great way to grow strawberries in a small space. These two towers show two options to build your own tower with basic and inexpensive materials.
Looking for more posts on Growing Strawberries? Check out:


 Just straight up homesteading ideas sent directly to you.